Hi, I'm Elle

I am a single mother of one, makeup loving, J. Crew wearing, graphic designer, writer, sister, daughter, Southern California native, and owner of one occasionally destructive giant Pomeranian. And I'm an Aquarius too. Welcome to my blog and of all of my life's caprice.

Search the Site

Keep in Touch 


The Cloud

Where I Shop

 FragranceNet.com Coupon Code SAVEPETS 5% Donation to Japan Pet Relief - 5% OFF Site Wide

    Entries in Ikea (5)

    Sunday
    Jan222012

    A Space That Perplexes Me

    P1253174

    I have an awkward little space in my bedroom that sits in between my closet and the bedroom door. Sometimes a little old trunk with a TV, and DVD player occupies the space, sometimes it’s just completely bare. Regardless, it really doesn’t do much to help with my lack of adequate storage in this room.

    I’ve tried hanging art work,  cork board, a memo board, a large calendar…I even tried out my nomadic building failure here, but it was a few inches too wide.

    I need something with either shelves or drawers…maybe something with both. It has to be less than 33 inches wide, short enough to clear the light switches, and thin enough to lessen the the number of times I collide with it. I’m clumsy, and have a tendency to walk into things that don’t move. Oh, and I don’t want to spend more than $100 for it.

    I thought about building something, but I don’t really have the time for it these days. I’ve been seeing a number of awesome hacks of the Ikea Rast 3 drawer dresser,

    image

    and at only $34, it could be a good fit for the space. (Check out some of my favorite hacks here and here.) The only issue with that is that the nearest Ikea is over 2 hours away, one way, and the shipping cost for just the dresser is almost as much as the dresser, and that’s all before I buy the stuff I ‘d need to hack it.

    So for now I will continue to look until I find something worth while.

    Maybe a good ole Billy.

    image

    They look a lot alike actually. And I could build a Billy lookalike for less than the $60 it costs, and out of real wood too…if I made the time that is.

    Decisions, decisions. That’s all for now though. Talk to you in the next one!

    Friday
    Apr222011

    Washing the Kivik: Take II

    As I mentioned before, I tried to wash my Kivik sofa, but it wasn’t a complete success. So today I tried again.

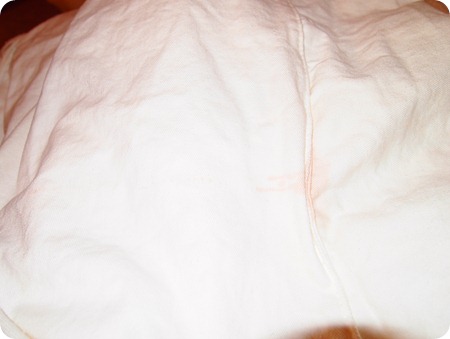
    The chocolate milk stains didn’t come out at all, and since my last wash,

    it has collected a few little finger shaped pizza grease spots. This time around, I bleached it.

    Now, even though it explicitly says do not bleach. I took it apart, and poured bleach directly over each of the stained areas, then used the little pen to spot clean parts on the right arm because I didn’t feel like going through the process of disassembling that arm too that side didn’t need to be washed.

    At any rate, about an hour later, the chocolate milk stains were gone and my Kivik was clean.

    I haven’t experienced any issues with shrinkage, or anything else so far. And I’ve tossed mine in the dryer…even though the care instructions say not to. I love my little Kivik.

    Now just have to work on my lighting…but I’ll save that for another day.

    Thursday
    Apr142011

    Washing the Kivik: Take 1

    There will be a take 2, simply because the first wash didn’t go so well. But I’ll start at the beginning.

    Our Kivik is about a month old now, and up until recently, has held up quite well and managed to stay clean.

    But that was until the unfortunate chocolate milk accident.

    Then my little superhero decided to use the cushions as the canvas for his latest art project.

    Now, my first was wasn’t a complete failure. It did get a little cleaner, it’s just that none of the stains were gone after it had been through a full cycle. And that is my fault for not properly pre-treating them.

    Actually, before I go any further, my first bit of advice is this:

    When you have finished assembling this, keep the tools that it came with, as you will need them to disassemble if you want to replace or wash your cover.

    Otherwise, you will need a clamp and a wrench. And possibly a helper,

    although for this project, if you can lift it on your own, one isn’t required for this project.

    If you only need to wash the cushions, you just unzip and pop them off, then toss them into the washing machine. But since the chocolate milk was spilled on the armrest, I had to flip Kivik over and take off its arm.

    I didn’t bleach it. The chocolate milk stain is still there,

    but the art project came out nicely. Then again, I usually have an easy time cleaning up Crayola in inappropriate places.

    I will show you how I get the stain out in the next post.

    Until then, please enjoy the rest of your day.